·
VB.NET
DataGridView - Related Contents
VB.NET
DataGridView binding - Sql Server
You can
extend the DataGridView control in a number of ways to build custom behaviors
into your applications. The DataGridView can display data in Bound mode,
unbound mode and Virtual mode . Bound mode is suitable for managing data using
automatic interaction with the data store. One very common use of the
DataGridView control is binding to a table in a database. Unbound mode is
suitable for displaying relatively small amounts of data that you manage
programmatically. Virtual mode gives you a higher degree of control by allowing
you to wait until a cell is actually being displayed to provide the value it
will contain.
The
following vb.net program shows how to bind a SQL Server dataset in a
DataGridView.
Imports System.Data.SqlClient
Public Class Form1
Private Sub Button1_Click(ByVal sender As System.Object, ByVal e As System.EventArgs) Handles Button1.Click
Dim connectionString As String = "Data Source=.;Initial Catalog=pubs;Integrated Security=True"
Dim sql As String = "SELECT * FROM Authors"
Dim connection As New SqlConnection(connectionString)
Dim dataadapter As New SqlDataAdapter(sql, connection)
Dim ds As New DataSet()
connection.Open()
dataadapter.Fill(ds, "Authors_table")
connection.Close()
DataGridView1.DataSource = ds
DataGridView1.DataMember = "Authors_table"
End Sub
End Class
DataGridView
binding - OLEDB in VB.NET
The
DataGridView can display data in Bound mode and unbound mode and Virtual mode.
The easiest way to get started using the DataGridView control is to use it in
basic data binding scenarios. The DataGridView control can display rows of data
from a data source. When you specify a data source for the DataGridView, by
default it will construct columns for you automatically. This will be created
based on the data types in the data source.
The
following vb.net program shows how to bind an OLEDB dataset in a DataGridView.
Imports System.Data.OleDb
Public Class Form1
Private Sub Button1_Click(ByVal sender As System.Object, ByVal e As System.EventArgs) Handles Button1.Click
Dim connectionString As String = "Provider=Microsoft.Jet.OLEDB.4.0;Data Source="Your .mdb path";"
Dim sql As String = "SELECT * FROM Authors"
Dim connection As New OleDbConnection(connectionString)
Dim dataadapter As New OleDbDataAdapter(sql, connection)
Dim ds As New DataSet()
connection.Open()
dataadapter.Fill(ds, "Authors_table")
connection.Close()
DataGridView1.DataSource = ds
DataGridView
Sorting/Filtering in VB.NET
The
DataGridView control provides a customizable table for displaying data. You can
extend the DataGridView control in a number of ways to build custom behaviors
into your applications. A DataView provides a means to filter and sort data
within a DataTable. The following vb.net program shows how to filter and sort a
DataGridView by using a DataView Object.
Dim dv
As DataView
dv = New
DataView(ds.Tables(0), "Price > 19", "Price Desc",
DataViewRowState.CurrentRows)
DataGridView1.DataSource
= dv
Imports System.Data.SqlClient
Public Class Form1
Private Sub Button1_Click(ByVal sender As System.Object, ByVal e As System.EventArgs) Handles Button1.Click
Dim connectionString As String = "Data Source=.;Initial Catalog=pubs;Integrated Security=True"
Dim sql As String = "SELECT * FROM Titles"
Dim connection As New SqlConnection(connectionString)
Dim dataadapter As New SqlDataAdapter(sql, connection)
Dim ds As New DataSet()
connection.Open()
dataadapter.Fill(ds, "Titles_table")
connection.Close()
Dim dv As DataView
dv = New DataView(ds.Tables(0), "Price > 19", "Price Desc", DataViewRowState.CurrentRows)
DataGridView1.DataSource = dv
End Sub
End Class
DataGridView
adding rows and columns in VB.NE he DataGridView control is designed to be a complete solution for
displaying tabular data with Windows Forms. The DataGridView control is highly
configurable and extensible, and it provides many properties, methods, and
events to customize its appearance and behavior. The DataGridView control is
used to display data from a variety of external data sources. Alternatively,
you can add rows and columns to the control and manually populate it with data.
The following vb.net source code shows how to manually create Columns and Rows
in a DataGridView.
DataGridView1.Columns(Index).Name
= "Column Name"
Imports System.Data.SqlClient
Public Class Form1
Private Sub Button1_Click(ByVal sender As System.Object, ByVal e As System.EventArgs) Handles Button1.Click
DataGridView1.ColumnCount = 3
DataGridView1.Columns(0).Name = "Product ID"
DataGridView1.Columns(1).Name = "Product Name"
DataGridView1.Columns(2).Name = "Product_Price"
Dim row As String() = New String() {"1", "Product 1", "1000"}
DataGridView1.Rows.Add(row)
row = New String() {"2", "Product 2", "2000"}
DataGridView1.Rows.Add(row)
row = New String() {"3", "Product 3", "3000"}
DataGridView1.Rows.Add(row)
row = New String() {"4", "Product 4", "4000"}
DataGridView1.Rows.Add(row)
End Sub
End Class
DataGridView
hiding rows and columns in VB.NET
The
DataGridView control provides a customizable table for displaying data. It
gives you number of properties, methods and events to customize its appearance
and behavior. Displaying data in a tabular format is a task you are likely to
perform frequently. The DataGridView control is designed to be a complete
solution for displaying tabular data with Windows Forms . The following vb.net
source code manually creates a DataGridView columns and rows and hide the
second column and second row.
DataGridView1.Rows(Index).Visible
= False
DataGridView1.Columns(Index).Visible
= False
Imports System.Data.SqlClient
Public Class Form1
Private Sub Button1_Click(ByVal sender As System.Object, ByVal e As System.EventArgs) Handles Button1.Click
DataGridView1.ColumnCount = 3
DataGridView1.Columns(0).Name = "Product ID"
DataGridView1.Columns(1).Name = "Product Name"
DataGridView1.Columns(2).Name = "Product_Price"
Dim row As String() = New String() {"1", "Product 1", "1000"}
DataGridView1.Rows.Add(row)
row = New String() {"2", "Product 2", "2000"}
DataGridView1.Rows.Add(row)
row = New String() {"3", "Product 3", "3000"}
DataGridView1.Rows.Add(row)
row = New String() {"4", "Product 4", "4000"}
DataGridView1.Rows.Add(row)
DataGridView1.Rows(1).Visible = False
End Sub
End Class
DataGridView
adding rows and columns in VB.NET
The
DataGridView control is designed to be a complete solution for displaying
tabular data with Windows Forms. The DataGridView control is highly
configurable and extensible, and it provides many properties, methods, and
events to customize its appearance and behavior. The DataGridView control is
used to display data from a variety of external data sources. Alternatively,
you can add rows and columns to the control and manually populate it with data.
The following vb.net source code shows how to manually create Columns and Rows
in a DataGridView.
DataGridView1.Columns(Index).Name
= "Column Name"
Imports System.Data.SqlClient
Public Class Form1
Private Sub Button1_Click(ByVal sender As System.Object, ByVal e As System.EventArgs) Handles Button1.Click
DataGridView1.ColumnCount = 3
DataGridView1.Columns(0).Name = "Product ID"
DataGridView1.Columns(1).Name = "Product Name"
DataGridView1.Columns(2).Name = "Product_Price"
Dim row As String() = New String() {"1", "Product 1", "1000"}
DataGridView1.Rows.Add(row)
row = New String() {"2", "Product 2", "2000"}
DataGridView1.Rows.Add(row)
row = New String() {"3", "Product 3", "3000"}
DataGridView1.Rows.Add(row)
row = New String() {"4", "Product 4", "4000"}
DataGridView1.Rows.Add(row)
End Sub
End Class
DataGridView
ReadOnly rows and columns in VB.NET
The
DataGridView control can display rows of data from a data source. You can
extend the DataGridView control in a number of ways to build custom behaviors
into your applications. The ReadOnly property indicates whether the data
displayed by the cell can be edited or not. You can set ReadOnly Property in
three levels. You can make entire dataGridView as ReadOnly.
dataGridView1.ReadOnly
= true
You can
make entire row as ReadOnly
dataGridView1.Rows(index).ReadOnly
= true;
You can
make entire Column as ReadOnly
dataGridView1.Columns(index).ReadOnly
= true;
The
following vb.net source code shows how to make a row as Readonly in a
DataGridView.
Imports System.Data.SqlClient
Public Class Form1
Private Sub Button1_Click(ByVal sender As System.Object, ByVal e As System.EventArgs) Handles Button1.Click
DataGridView1.ColumnCount = 3
DataGridView1.Columns(0).Name = "Product ID"
DataGridView1.Columns(1).Name = "Product Name"
DataGridView1.Columns(2).Name = "Product_Price"
Dim row As String() = New String() {"1", "Product 1", "1000"}
DataGridView1.Rows.Add(row)
row = New String() {"2", "Product 2", "2000"}
DataGridView1.Rows.Add(row)
row = New String() {"3", "Product 3", "3000"}
DataGridView1.Rows.Add(row)
row = New String() {"4", "Product 4", "4000"}
DataGridView1.Rows.Add(row)
DataGridView1.Rows(1).ReadOnly = True
End Sub
End Class
Adding
Button to DataGridView in VB.NET
The
DataGridView control is highly configurable and extensible, and it provides
many properties, methods, and events to customize its appearance and behavior.
The DataGridView control provides TextBox, CheckBox, Image, Button, ComboBox
and Link columns with the corresponding cell types. With the
DataGridViewButtonColumn, you can display a column of cells that contain
buttons.You can respond to user clicks in button cells by handling the
DataGridView.CellClick event.
The following vb.net program shows how to add a Button in Cell of
a DataGridView control. Also it showing in the DataGridView.CellClick event
which button the user clicked.
Imports System.Data.SqlClient
Public Class Form1
Private Sub Button1_Click(ByVal sender As System.Object, ByVal e As System.EventArgs) Handles Button1.Click
DataGridView1.ColumnCount = 3
DataGridView1.Columns(0).Name = "Product ID"
DataGridView1.Columns(1).Name = "Product Name"
DataGridView1.Columns(2).Name = "Product_Price"
Dim row As String() = New String() {"1", "Product 1", "1000"}
DataGridView1.Rows.Add(row)
row = New String() {"2", "Product 2", "2000"}
DataGridView1.Rows.Add(row)
row = New String() {"3", "Product 3", "3000"}
DataGridView1.Rows.Add(row)
row = New String() {"4", "Product 4", "4000"}
DataGridView1.Rows.Add(row)
Dim btn As New DataGridViewButtonColumn()
DataGridView1.Columns.Add(btn)
btn.HeaderText = "Click Data"
btn.Text = "Click Here"
btn.Name = "btn"
btn.UseColumnTextForButtonValue = True
End Sub
Private Sub DataGridView1_CellClick(ByVal sender As System.Object, ByVal e As System.Windows.Forms.DataGridViewCellEventArgs) Handles DataGridView1.CellClick
If e.ColumnIndex = 3 Then
MsgBox(("Row : " + e.RowIndex.ToString & " Col : ") + e.ColumnIndex.ToString)
End If
End Sub
End Class
Adding
CheckBox to DataGridView in VB.NE
he DataGridView control uses several column types to display its
information and enable users to modify or add information. The DataGridView
control provides TextBox, CheckBox, Image, Button, ComboBox and Link columns
with the corresponding cell types.
The
following vb.net program shows how to add a CheckBox in Cell of a DataGridView
control and set the third row checkbox value as true. If you want to respond
immediately when users click a check box cell, you can handle the CellClick
event, but this event occurs before the cell value is updated.
Imports System.Data.SqlClient
Public Class Form1
Private Sub Button1_Click(ByVal sender As System.Object, ByVal e As System.EventArgs) Handles Button1.Click
DataGridView1.ColumnCount = 3
DataGridView1.Columns(0).Name = "Product ID"
DataGridView1.Columns(1).Name = "Product Name"
DataGridView1.Columns(2).Name = "Product_Price"
Dim row As String() = New String() {"1", "Product 1", "1000"}
DataGridView1.Rows.Add(row)
row = New String() {"2", "Product 2", "2000"}
DataGridView1.Rows.Add(row)
row = New String() {"3", "Product 3", "3000"}
DataGridView1.Rows.Add(row)
row = New String() {"4", "Product 4", "4000"}
DataGridView1.Rows.Add(row)
Dim chk As New DataGridViewCheckBoxColumn()
DataGridView1.Columns.Add(chk)
chk.HeaderText = "Check Data"
chk.Name = "chk"
DataGridView1.Rows(2).Cells(3).Value = True
End Sub
End Class
Adding
ComboBox to DataGridView in VB.NET
The
DataGridView control provides TextBox, CheckBox, Image, Button, ComboBox and
Link columns with the corresponding cell types. You can populate the drop down
list used for all cells the same way you would populate a ComboBox drop down
list, either manually through the collection returned by the Items property, or
by binding it to a data source through the DataSource, DisplayMember, and ValueMember
properties.
The following vb.net program shows how to add a ComboBox in Cell
of a DataGridView control.
Imports System.Data.SqlClient
Public Class Form1
Private Sub Button1_Click(ByVal sender As System.Object, ByVal e As System.EventArgs) Handles Button1.Click
DataGridView1.ColumnCount = 3
DataGridView1.Columns(0).Name = "Product ID"
DataGridView1.Columns(1).Name = "Product Name"
DataGridView1.Columns(2).Name = "Product_Price"
Dim row As String() = New String() {"1", "Product 1", "1000"}
DataGridView1.Rows.Add(row)
row = New String() {"2", "Product 2", "2000"}
DataGridView1.Rows.Add(row)
row = New String() {"3", "Product 3", "3000"}
DataGridView1.Rows.Add(row)
row = New String() {"4", "Product 4", "4000"}
DataGridView1.Rows.Add(row)
Dim cmb As New DataGridViewComboBoxColumn()
cmb.HeaderText = "Select Data"
cmb.Name = "cmb"
cmb.MaxDropDownItems = 4
cmb.Items.Add("True")
cmb.Items.Add("False")
DataGridView1.Columns.Add(cmb)
End Sub
End Class
Adding
Image to DataGridView in VB.NET
The
DataGridView control and its related classes are designed to be a flexible,
extensible system for displaying and editing tabular data. We can add an Image
control in a column of DataGridView. This column type exposes Image and
ImageLayout properties in addition to the usual base class properties. Setting
the columns Image property results in that image being displayed by default for
all the cells in that column. Populating an image column manually is useful
when you want to provide the functionality of a DataGridViewButtonColumn, but
with a customized appearance.
The following vb.net program shows how to add a Image in column of
a DataGridView control.
Imports System.Data.SqlClient
Public Class Form1
Private Sub Button1_Click(ByVal sender As System.Object, ByVal e As System.EventArgs) Handles Button1.Click
DataGridView1.ColumnCount = 3
DataGridView1.Columns(0).Name = "Product ID"
DataGridView1.Columns(1).Name = "Product Name"
DataGridView1.Columns(2).Name = "Product_Price"
Dim row As String() = New String() {"1", "Product 1", "1000"}
DataGridView1.Rows.Add(row)
row = New String() {"2", "Product 2", "2000"}
DataGridView1.Rows.Add(row)
row = New String() {"3", "Product 3", "3000"}
DataGridView1.Rows.Add(row)
row = New String() {"4", "Product 4", "4000"}
DataGridView1.Rows.Add(row)
Dim img As New DataGridViewImageColumn()
Dim inImg As Image = Image.FromFile("Image Path")
img.Image = inImg
DataGridView1.Columns.Add(img)
img.HeaderText = "Image"
img.Name = "img"
End Sub
End Class
Adding
ViewLink to DataGridView in VB.NET
The
DataGridView control provides TextBox, CheckBox, Image, Button, ComboBox and
Link columns with the corresponding cell types. We can add hyperlink in the
column of a DataGridView , the column type contains cells of type
DataGridViewLinkCell and renders the text in the cell to look like a hyperlink.
Link columns are not generated automatically when data binding a DataGridView
control. To use link columns, you must create them manually and add them to the
collection returned by the Columns property.
The
following vb.net program shows how to add a hyperlink in a column of
DataGridView control.
Imports System.Data.SqlClient
Public Class Form1
Private Sub Button1_Click(ByVal sender As System.Object, ByVal e As System.EventArgs) Handles Button1.Click
DataGridView1.ColumnCount = 3
DataGridView1.Columns(0).Name = "Product ID"
DataGridView1.Columns(1).Name = "Product Name"
DataGridView1.Columns(2).Name = "Product_Price"
Dim row As String() = New String() {"1", "Product 1", "1000"}
DataGridView1.Rows.Add(row)
row = New String() {"2", "Product 2", "2000"}
DataGridView1.Rows.Add(row)
row = New String() {"3", "Product 3", "3000"}
DataGridView1.Rows.Add(row)
row = New String() {"4", "Product 4", "4000"}
DataGridView1.Rows.Add(row)
Dim lnk As New DataGridViewLinkColumn()
DataGridView1.Columns.Add(lnk)
lnk.HeaderText = "Link Data"
lnk.Name = "http://vb.net-informations.com"
lnk.Text = "http://vb.net-informations.com"
lnk.UseColumnTextForLinkValue = True
End Sub
End Class
How
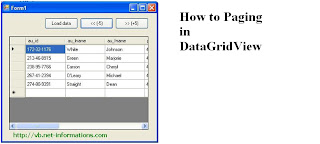
to Paging in DataGridView
The
DataGridView class allows customization of cells, rows, columns, and borders
through the use of its properties . If a DataGridView has lot of rows then we
can implement paging functionalities to the DataGridView control. While we
implement paging we should know the boundaries of the pages to enable the
paging in the DatagridView.
The
following vb.net program provides a way to programmatically implement paging in
a Windows Datagrid View control. Here the DataGridView rows fixed as five rows
and other two buttons are there for implementing paging functionalities.
Imports
System.Data.SqlClient
Public Class Form1
Dim pagingAdapter As SqlDataAdapter
Dim pagingDS As DataSet
Dim scrollVal As Integer
Private Sub Button1_Click(ByVal sender As
System.Object, ByVal e As System.EventArgs) Handles Button1.Click
Dim connectionString As String =
"Data Source=.;Initial Catalog=pubs;Integrated Security=True"
Dim sql As String = "SELECT * FROM
authors"
Dim connection As New
SqlConnection(connectionString)
pagingAdapter = New SqlDataAdapter(sql,
connection)
pagingDS = New DataSet()
connection.Open()
pagingAdapter.Fill(pagingDS, scrollVal,
5, "authors_table")
connection.Close()
DataGridView1.DataSource = pagingDS
DataGridView1.DataMember =
"authors_table"
End Sub
Private Sub button2_Click(ByVal sender As
System.Object, ByVal e As System.EventArgs) Handles button2.Click
scrollVal = scrollVal - 5
If scrollVal <= 0 Then
scrollVal = 0
End If
pagingDS.Clear()
pagingAdapter.Fill(pagingDS, scrollVal,
5, "authors_table")
End Sub
Private Sub button3_Click(ByVal sender As
System.Object, ByVal e As System.EventArgs) Handles button3.Click
scrollVal = scrollVal + 5
If scrollVal > 23 Then
scrollVal = 18
End If
pagingDS.Clear()
pagingAdapter.Fill(pagingDS, scrollVal,
5, "authors_table")
End Sub
End Class
How
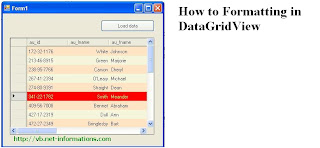
to Formatting in DataGridView
The
DataGridView control is highly configurable and extensible, and it provides
many properties, methods, and events to customize its appearance and behavior.
You can extend the DataGridView control in a number of ways to build custom
behaviors into your applications.
The
DataGridView control makes it easy to define the basic appearance of cells and
the display formatting of cell values. Typically, however, multiple cells will
share particular style characteristics. You can define appearance and
formatting styles for individual cells, for cells in specific columns and rows,
or for all cells in the control by setting the properties of the
DataGridViewCellStyle objects accessed through various DataGridView control
properties.
The
following vb.net program shows how to implement different ways of cell
formatting in a DataGridView control.
Imports
System.Data.SqlClient
Public Class Form1
Private Sub Button1_Click(ByVal sender As
System.Object, ByVal e As System.EventArgs) Handles Button1.Click
Dim connectionString As String =
"Data Source=.;Initial Catalog=pubs;Integrated Security=True"
Dim sql As String = "SELECT * FROM
Authors"
Dim connection As New
SqlConnection(connectionString)
Dim dataadapter As New
SqlDataAdapter(sql, connection)
Dim ds As New DataSet()
connection.Open()
dataadapter.Fill(ds,
"Authors_table")
connection.Close()
DataGridView1.DataSource = ds
DataGridView1.DataMember =
"Authors_table"
DataGridView1.GridColor = Color.Red
DataGridView1.CellBorderStyle =
DataGridViewCellBorderStyle.None
DataGridView1.BackgroundColor =
Color.LightGray
DataGridView1.DefaultCellStyle.SelectionBackColor = Color.Red
DataGridView1.DefaultCellStyle.SelectionForeColor = Color.Yellow
DataGridView1.DefaultCellStyle.WrapMode
= DataGridViewTriState.[True]
DataGridView1.SelectionMode =
DataGridViewSelectionMode.FullRowSelect
DataGridView1.AllowUserToResizeColumns
= False
DataGridView1.RowsDefaultCellStyle.BackColor = Color.Bisque
DataGridView1.AlternatingRowsDefaultCellStyle.BackColor = Color.Beige
End Sub
End Class
How
to DataGridView Template
There
are situations that you want greater control over the appearance of
DataGridView rows than what is provided by the various DataGridView cell style
properties. The row template gives you greater control over the appearance and
behavior of rows than the RowsDefaultCellStyle property provides. With the row
template, you can set any DataGridViewRow properties, including
DefaultCellStyle. When displaying external data, however, the rows are
generated automatically, but they are based on the row template, which you can
set to an instance of your custom row type.
The
following vb.net code example illustrates how to use the row template to
specify an initial row height and a minimum row height and BackColor.
Imports
System.Data.SqlClient
Public Class Form1
Private Sub Button1_Click(ByVal sender As
System.Object, ByVal e As System.EventArgs) Handles Button1.Click
Dim row As DataGridViewRow =
Me.DataGridView1.RowTemplate
row.DefaultCellStyle.BackColor =
Color.Bisque
row.Height = 35
row.MinimumHeight = 20
Dim connectionString As String =
"Data Source=.;Initial Catalog=pubs;Integrated Security=True"
Dim sql As String = "SELECT * FROM
Authors"
Dim connection As New
SqlConnection(connectionString)
Dim dataadapter As New
SqlDataAdapter(sql, connection)
Dim ds As New DataSet()
connection.Open()
dataadapter.Fill(ds,
"Authors_table")
connection.Close()
DataGridView1.DataSource = ds
DataGridView1.DataMember =
"Authors_table"
End Sub
End Class
How
to DataGridView Printing
The
DataGridView control provides a customizable table for displaying data. It
gives you number of properties, methods and events to customize its appearance
and behavior. Unfortunately the DataGridView doesn't have a built in printing
functionality . So here we do a tricky way to print the content of DataGridView
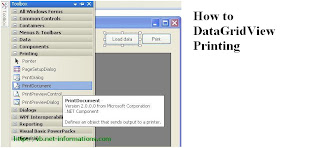
. Here we add a PrintDocument object to the project and handle the PrintPage
event which is called every time a new page is to be printed. Here in the
PrintPage event we create a Bitmap Object and draw the DataGridView to the
Bitmap Object.
In
order to run this vb.net project you have to drag two buttons ,one for load
data and one for print command, and drag a PrintDocument control on your form .
The following picture shows how to drag PrintDocument Object to your project.
Imports
System.Data.SqlClient
Public Class Form1
Private Sub Button1_Click(ByVal sender As
System.Object, ByVal e As System.EventArgs) Handles Button1.Click
Dim connectionString As String =
"Data Source=.;Initial Catalog=pubs;Integrated Security=True"
Dim sql As String = "SELECT * FROM
Authors"
Dim connection As New
SqlConnection(connectionString)
Dim dataadapter As New
SqlDataAdapter(sql, connection)
Dim ds As New DataSet()
connection.Open()
dataadapter.Fill(ds,
"Authors_table")
connection.Close()
DataGridView1.DataSource = ds
DataGridView1.DataMember =
"Authors_table"
End Sub
Private Sub Button2_Click(ByVal sender As
System.Object, ByVal e As System.EventArgs) Handles Button2.Click
PrintDocument1.Print()
End Sub
Private Sub PrintDocument1_PrintPage(ByVal
sender As System.Object, ByVal e As System.Drawing.Printing.PrintPageEventArgs)
Handles PrintDocument1.PrintPage
Dim bm As New
Bitmap(Me.DataGridView1.Width, Me.DataGridView1.Height)
DataGridView1.DrawToBitmap(bm, New
Rectangle(0, 0, Me.DataGridView1.Width, Me.DataGridView1.Height))
e.Graphics.DrawImage(bm, 0, 0)
End Sub
End Class
How
to Export datagridview to Excel
The
DataGridView control provides a customizable table for displaying data.
Displaying data in a tabular format is a task you are likely to perform
frequently. The DataGridView control is highly configurable and extensible, and
it provides many properties, methods, and events to customize its appearance
and behavior.
The
following vb.net source code shows how to Export the content of a datagridview
to an Excel file.
Imports
System.Data.SqlClient
Imports Excel =
Microsoft.Office.Interop.Excel
Public Class Form1
Private Sub Button1_Click(ByVal sender As
System.Object, ByVal e As System.EventArgs) Handles Button1.Click
Dim connectionString As String =
"Data Source=.;Initial Catalog=pubs;Integrated Security=True"
Dim sql As String = "SELECT * FROM
Authors"
Dim connection As New
SqlConnection(connectionString)
Dim dataadapter As New
SqlDataAdapter(sql, connection)
Dim ds As New DataSet()
connection.Open()
dataadapter.Fill(ds,
"Authors_table")
connection.Close()
DataGridView1.DataSource = ds
DataGridView1.DataMember =
"Authors_table"
End Sub
Private Sub Button2_Click(ByVal sender As
System.Object, ByVal e As System.EventArgs) Handles Button2.Click
Dim xlApp As Excel.Application
Dim xlWorkBook As Excel.Workbook
Dim xlWorkSheet As Excel.Worksheet
Dim misValue As Object =
System.Reflection.Missing.Value
Dim i As Int16, j As Int16
xlApp = New Excel.ApplicationClass
xlWorkBook = xlApp.Workbooks.Add(misValue)
xlWorkSheet =
xlWorkBook.Sheets("sheet1")
For i = 0 To DataGridView1.RowCount - 2
For j = 0 To
DataGridView1.ColumnCount - 1
xlWorkSheet.Cells(i + 1, j + 1)
= DataGridView1(j, i).Value.ToString()
Next
Next
xlWorkBook.SaveAs("c:\vb.net-informations.xls",
Excel.XlFileFormat.xlWorkbookNormal, misValue, misValue, misValue, misValue, _
Excel.XlSaveAsAccessMode.xlExclusive,
misValue, misValue, misValue, misValue, misValue)
xlWorkBook.Close(True, misValue,
misValue)
xlApp.Quit()
releaseObject(xlWorkSheet)
releaseObject(xlWorkBook)
releaseObject(xlApp)
MessageBox.Show("Over")
End Sub
Private Sub releaseObject(ByVal obj As
Object)
Try
System.Runtime.InteropServices.Marshal.ReleaseComObject(obj)
obj = Nothing
Catch ex As Exception
obj = Nothing
MessageBox.Show("Exception
Occured while releasing object " + ex.ToString())
Finally
GC.Collect()
End Try
End Sub
End Class
Database
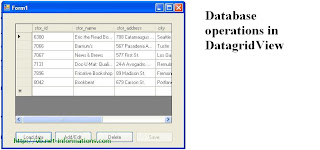
operations in DatagridView
The
DataGridView control can display rows of data from a data source. The
DataGridView can display data in Bound mode, unbound mode and Virtual mode .
Bound mode is suitable for managing data using automatic interaction with the
data store. One very common use of the DataGridView control is binding to a
table in a database. Unbound mode is suitable for displaying relatively small
amounts of data that you manage programmatically. Virtual mode gives you a
higher degree of control by allowing you to wait until a cell is actually being
displayed to provide the value it will contain.
The
following vb.net source code illustrate how to connect a DataGridView to a
database and addnew/update or delete the database values from DataGridView.
Imports
System.Data.SqlClient
Public Class Form1
Dim sCommand As SqlCommand
Dim sAdapter As SqlDataAdapter
Dim sBuilder As SqlCommandBuilder
Dim sDs As DataSet
Dim sTable As DataTable
Private Sub load_btn_Click(ByVal sender As
System.Object, ByVal e As System.EventArgs) Handles load_btn.Click
Dim connectionString As String =
"Data Source=.;Initial Catalog=pubs;Integrated Security=True"
Dim sql As String = "SELECT * FROM
Stores"
Dim connection As New
SqlConnection(connectionString)
connection.Open()
sCommand = New SqlCommand(sql,
connection)
sAdapter = New SqlDataAdapter(sCommand)
sBuilder = New
SqlCommandBuilder(sAdapter)
sDs = New DataSet()
sAdapter.Fill(sDs, "Stores")
sTable = sDs.Tables("Stores")
connection.Close()
DataGridView1.DataSource =
sDs.Tables("Stores")
DataGridView1.ReadOnly = True
save_btn.Enabled = False
DataGridView1.SelectionMode =
DataGridViewSelectionMode.FullRowSelect
End Sub
Private Sub new_btn_Click(ByVal sender As
System.Object, ByVal e As System.EventArgs) Handles new_btn.Click
DataGridView1.[ReadOnly] = False
save_btn.Enabled = True
new_btn.Enabled = False
delete_btn.Enabled = False
End Sub
Private Sub delete_btn_Click(ByVal sender
As System.Object, ByVal e As System.EventArgs) Handles delete_btn.Click
If MessageBox.Show("Do you want to
delete this row ?", "Delete", MessageBoxButtons.YesNo) =
DialogResult.Yes Then
DataGridView1.Rows.RemoveAt(DataGridView1.SelectedRows(0).Index)
sAdapter.Update(sTable)
End If
End Sub
Private Sub save_btn_Click(ByVal sender As
System.Object, ByVal e As System.EventArgs) Handles save_btn.Click
sAdapter.Update(sTable)
DataGridView1.[ReadOnly] = True
save_btn.Enabled = False
new_btn.Enabled = True
delete_btn.Enabled = True
End Sub
End Class


No comments:
Post a Comment